
Beginner Tips for Composting at Home: A Simple Guide
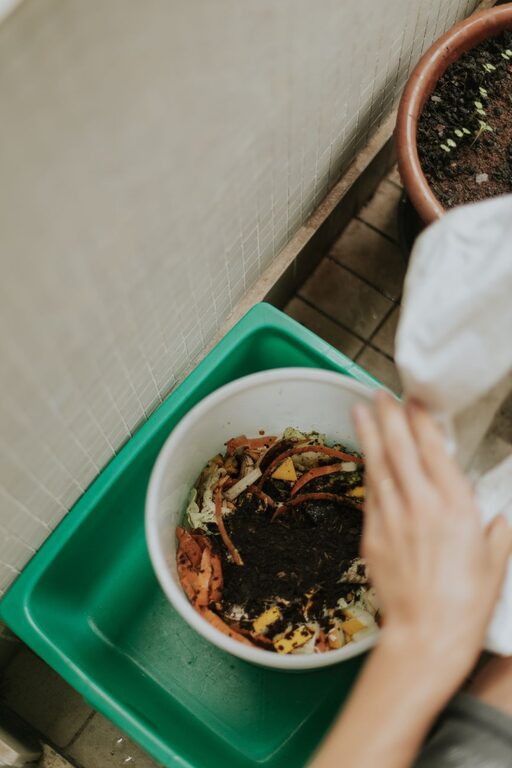
Composting is a fantastic way to reduce household waste and create nutrient-rich soil for your plants. If you’re new to composting, it might seem a bit intimidating at first, but with some simple steps, anyone can start turning kitchen scraps and yard waste into valuable compost. This guide offers beginner tips to help you get started and maintain a healthy compost bin at home.
What is Composting?
Composting is the natural process of recycling organic materials like food scraps and yard waste into a dark, nutrient-packed soil amendment called compost. This compost enriches garden soil, helps retain moisture, and reduces the need for chemical fertilizers.
Benefits of Composting at Home
– Reduces waste: Keeps food and yard waste out of landfills.
– Improves soil: Adds essential nutrients and improves soil structure.
– Promotes healthier plants: Supports strong plant growth naturally.
– Saves money: Lowers the need for store-bought fertilizers.
– Eco-friendly: Helps reduce greenhouse gas emissions.
Getting Started: What You Need
You don’t need fancy equipment to begin composting. Here are a few basic items:
– Compost bin or pile: This can be a commercial compost bin, a DIY bin, or simply a dedicated spot in your yard.
– Kitchen scraps: Fruit and vegetable peels, coffee grounds, eggshells.
– Yard waste: Grass clippings, leaves, small branches.
– Water: To keep your compost moist, like a wrung-out sponge.
– Aeration tool: A garden fork or compost aerator to mix materials.
Step 1: Choose the Right Spot
Select a dry, shady spot in your yard for your compost bin or pile. Avoid places that get full sun all day or are too wet, as these conditions can disrupt the composting process.
Step 2: Understand What to Compost
What to Add
– Green materials: These are nitrogen-rich items like vegetable scraps, fruit waste, grass clippings, coffee grounds, and fresh plant trimmings.
– Brown materials: Carbon-rich stuff including dry leaves, straw, shredded paper, cardboard, and small twigs.
What to Avoid
– Meat, dairy products, oils, and pet waste can attract pests and cause odors.
– Diseased plants or pest-infested material should not be composted to avoid spreading problems.
Step 3: Balance Greens and Browns
A healthy compost pile needs a good balance of green and brown materials. A common guideline is to aim for roughly 2 to 3 parts brown materials to 1 part green materials. Browns add carbon and help keep the compost aerated, while greens contribute nitrogen to feed the microbes that break down the pile.
Step 4: Layer Your Compost
Start with a layer of coarse browns like dry leaves or small branches to create airflow. Alternate layers of greens and browns, roughly 3-6 inches thick each. This layering helps maintain the right balance and speeds up decomposition.
Step 5: Keep the Compost Moist
Moisture is crucial for microbes to thrive. Your compost should be as damp as a wrung-out sponge. If it’s too dry, add water; if too wet, add more dry browns and turn the pile to improve airflow.
Step 6: Turn Your Compost Regularly
Turning your compost every 1-2 weeks introduces oxygen, which is essential for bacteria and fungi that break down material. Use a garden fork or a compost aerator to mix the pile, helping it decompose faster and avoiding unpleasant smells.
Step 7: Be Patient
Composting takes time. Depending on conditions like temperature, aeration, and moisture, it can take anywhere from a few months to a year for compost to be ready. Finished compost looks dark, crumbly, and smells earthy.
Troubleshooting Common Compost Issues
– Bad smells: Usually caused by too much green material or poor aeration. Add more browns and turn the pile.
– Pile too dry: Add water and mix to distribute moisture evenly.
– Pile too wet: Add dry materials and turn to increase airflow.
– Slow decomposition: Make sure you have a balanced mix of greens and browns, and turn regularly.
Using Your Finished Compost
Once your compost is ready, you can:
– Mix it into garden soil to improve structure and nutrients.
– Use as mulch around plants to help retain moisture and suppress weeds.
– Add to potting mixes for a nutrient boost.
Additional Tips for Success
– Chop or shred larger materials to speed up decomposition.
– Avoid adding weeds that have gone to seed to prevent unwanted growth.
– Consider using a compost thermometer to monitor temperature if you want to be precise.
– Start small and expand your composting as you get comfortable.
Composting Indoors: Bokashi and Vermicomposting
If you don’t have yard space, you can try indoor methods like:
– Bokashi: A fermentation method using special bran to break down scraps quickly.
– Vermicomposting: Using worms to digest organic waste in a worm bin.
Both are excellent alternatives for apartment dwellers or those with limited outdoor space.
—
Composting at home is a rewarding practice that benefits your garden and the environment. By following these beginner tips, you can start composting today and enjoy richer soil, less waste, and a greener lifestyle. Happy composting!